Papertrey Ink


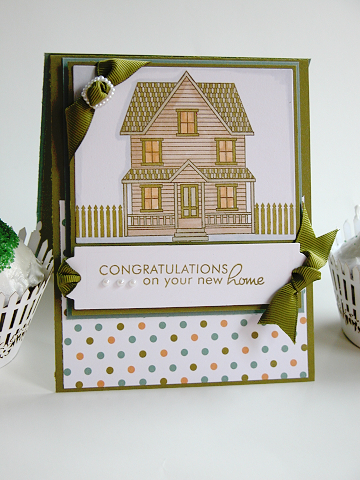
So we have a new family who moved in up the street.  It just so happens that I ran into the “Dad” of the family on the train weeks ago and they said they were moving onto my street.  I chuckled and introduced myself.  Nothing like being late welcoming someone to the neigborhood!  So I made some nice moxy fab cupcakes with fun pearly gates…um…err..fences.  So now I can welcome them properly.  I chose the colors of their house as a starting point and went from there!  Hope you like it!  Um..those wraps for the cupcakes?  Another Fancy Flours find!  Tee hee hee. 

I am giving a concert at Swarthmore College today.  All Medieval music.  Fun times.  I am also figuring out how I am going to get htis house cleaned in time before my whole family comes for my brother’s wedding on the 15th.  Man…I have a ton of stuff to do.  Pray for me! LOL!  Also…there will be  something special happening with my blog soon…stay tuned… ;))))


Supplies:

Stamps: Boards and Beams

Paper: Ripe Avacado, Ocean Tides, Polka Dot Parade

Ink: Ripe Avacado, Copic Markers

Ribbon: Ripe Avacado Grosgrain

Other: Spellbinders Tag Die, Pearls (Ellen Hutson), Cupcake Surrounds Fancy Flours
The Challenge:

“Button up for Winter — I don’t know about most of you, but where I live there are a lot of things that need to be done before winter hits, and that’s what we’re doing with our cards today — buttoning up for winter — BUT, it is still fall, not winter, so today’s challenge is to make a fall card and incorporate a button on it — that’s it — oh, I’m seeing lots of cozy, warm, homey cards in my mind, but I can’t WAIT to see how you all interpret this challenge!!!  Remember to try to keep it simple, quick and most importantly, HAVE FUN!!!  (Oh, and  a button can be real, faux, sticker, stamped — whatever, we’re easy!)”

Well…first off “HAPPY HALLOWEEN!”  I have a very special project for you today!  First…here is the card to go along with it!  My card is not very warm…but it IS very spooky for today and it matches my project to go along with it!  I hope you enjoy!

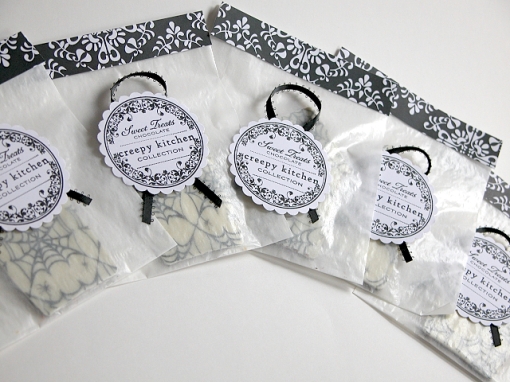
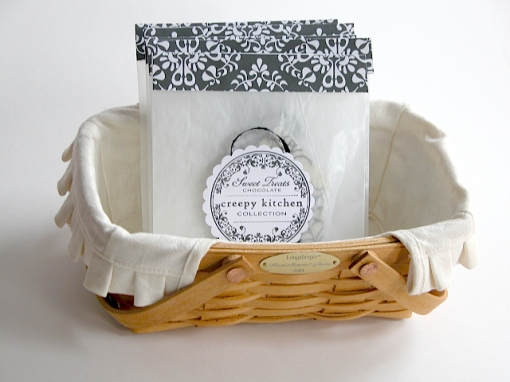
Do you like it?  OK…now on to the project!  I found this site through a video I was watching called Fancy Flours.  YES!  I exclaimed,  I had been looking for these chocolate transfer papers for a LONG time!  I had the perfect house cookie cutter for it for my spooky houses.  So I microwaved (YES…microwaved) the white chocolate (white chocolate chips), spread it over top of the sheet using an off-set spatula over top of the whole image which is attached to an acrylic backing.  Then I melted the dark chocolate chips and spread it over the cooled white chocolate.  I then added some halloween colored candy beads on top.  I packaged them up for the kids to take to school for the faculty.  Enjoy!

Supplies:

Stamps: Trajan Monogram Edition, Simple Alphabet, Faux Ribbon (which made the guidelines for my stitching!) Spooky Sweets II

Paper: White, American Crafts,

Ink: Palette Noir, Versamark

Ribbon: Black eyelet, Black Embroidery Floss

Other: Large Glassine Bags, Black Embossing powder (for spider), Giga scalloped Circle Marvy Punch, Black Button, dimensionals, glue dots to hold ribbon in place.

Go see what the other girls did! 

Darlene (we will miss you!)

Sharon

Julie

Dee

Tammy

Janine

Jennifer

First of all…..THE PHILLIES WON THE PENNANT!!!!!!!!!!!

Oh the loveliness of Christmas!  Doesn’t it make you joyful?  I really think we should remember how we felt as children at Christmas time.  So excited and full of awe at its very meaning.  I really wanted to capture the childhood whimsy of Christmas and yet make what was inside special with a little more elegance.  Don’t you think that polka dots never go out of style?  I feel like polka dots and stripes are one of those things that always work in any kind of design.  Trendy or classic, it can be everything I suppose.  It is all in how you use them.  So here is my whimsical elegant box.  A sweet reminder of the first day the tree gets put up at home and all of the ornament boxes come out.  Such a joyful time for a joyful reason.  I hope you try this yourself.  It would be a wonderful gift for anyone.

these small ornament balls were found at Michaels for I believe $3.99.  There are enough ornaments in the box in which it came to make two of these gift boxes!  So the egg box is only $4.00 and the ornaments for this project is roughly $2.00.  Not too shabby for a gift that looks like it costs a fortune.  If you have any questions, please let me know.  I will be happy to answer them in the comments section.  Thanks!  Have a great day!  I will be speding my day with Cindy Lyles!  How fun!

Supplies:

Stamps: Take a Bough

Paper: Polka Dot Parade, Ripe Avacado, Aqua Mist

Ink: Versa Magic Chalk Ink, Palette Noir

Ribbon: Ocean Tides Satin

Other: Papertrey Egg Box, Clear Frame with Polka Dots, EK success 1 3/8 inch punch (for inside of box for the circles), 3/4 inch EK success circle punch for the ornament balls. Nestabilities, We R Memory Keepers Hardware.

Designer Note: To make the circle punches on the paper inside where the holes are in the cardboard, Cut your Polka dot Basic paper to size for the insert in the box, then flip around and trace holes.  Use the 1 3/8th inch punch centering it in the trace marks just made.  The punch is smaller than the traced circles to hold the balls upright.  This assures the perfect size holes for the small ornaments.

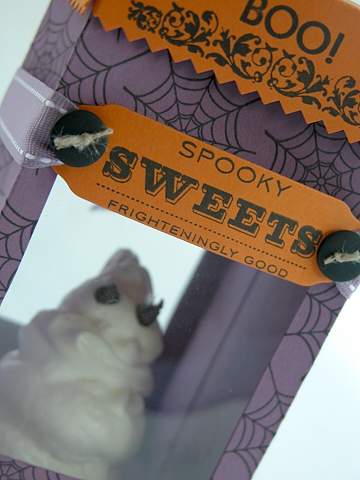
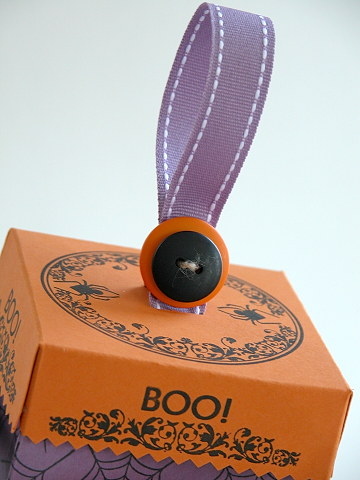
Sophie and I had a blast yesterday making our merengue ghosts!  They turned out so sweetly, I decided to showcase one in one of Lauren’s new Timeless Templates!  Lauren has done such an incredible job with these templates and they can be yours for such an incredibly cheap price…printable and SO fast (plus you get never-before-seen projects from the girls on the PTI team with full color pics and supplies!  Gotta love that!  Well…here is ANOTHER idea!  I just love everything about this!  John said it was his favorite project from me so far!  I think he was almost in tears!  (Just kidding…but maybe he should have been;) )  I mean how perfect would this be for teachers this week on Friday!  How fun!  I am going to leave you with my merengue recipe so you can do this as well!  Go make them…you already have all of the ingredients!  Your kids will be thrilled!

Merengue Recipe:

4 egg whites in mixing bowl add 1tsp. Cream of Tartar

Beat until stiff peaks form

While beating, slowly add between 3/4 cups and 1 cup of sugar (depending on how sweet you like it)

Fill piping bag with merengue (or ziplock bag with bottom corner snipped off) pick favorite piping bag tip.

Pipe on brown paper grocery bag or parchment paper in concentric circles making sure when you get to the top to add a little ghost flip for the top!

Add mini chocolate chips for the eyes

put paper in the oven and bake at 250 degrees for two hours at least.  You are essentially just “drying out” the meregue, not baking it per se.


SUPPLIES:

Template: My Timeless Templates “For Keep{sake}”

Stamps: Spooky Sweets, Spooky Sweets II

Paper: Plum Pudding, Pumpkin SU!, Transparency

Ink: Noir Palette

Ribbon: Plum Pudding Stitched Grosgrain

Other: Buttons, Linen Thread SU!

EDITED TO ADD:

After viewing my blog on my work computer and my laptop, I have noticed that some things or all things in my sidebar have disappeared.  Don’t panic!  I am having some work done on my blog that is very exciting and will be revealed soon!  Thanks for your patience if some thing are not showing up or have gotten a little shuffled!

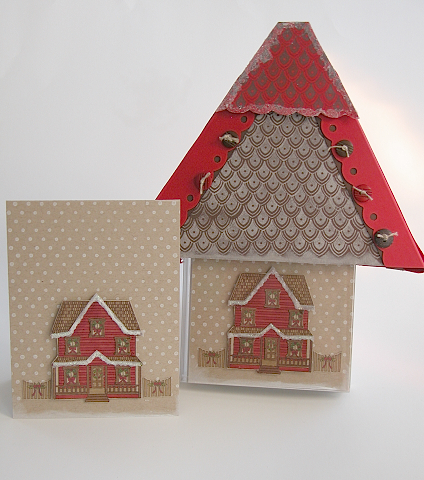
I made this boxed set of cards for the Paper Crafts Christmas Tree this year.  The colors of the items on the trees will be brown, red and green.  I wanted the box to look like a house, so I made this “roof topper’ for the box.  Using the background of First Fruits, I stamped the “shingles” and added some glitter at tht top for snow.  There is a ribbon which runs up either side of the roofline with a large loop to hang on tree.  The houses on the cards took a while to do, but the rest of the card I made very simple by using the Polka Dot Basics set in white chalk ink for the snow.  I stopped just before the bottom to make it look like it was snowing and added swipes of the chalk ink to the bottom of the card to make it look snow swept.  I used vellum and stickes for the snow on the house.  On the inside the sentiment stamped reads “There’s no place like home for the holidays”  You can see this Christmas addition to “Boards and Beams” HERE.  Have a great day, and don’t forget to come back tomorrow for the Stamp Simply Challenge! 

Supplies:

Stamps: Boards and Beams, Home for the Holidays, Polka Dot Basics, First Fruits

Paper: Pure Poppy, Dark Chocolate, Kraft, Vellum

Ink: White Chalk, Dark Chocolate

Ribbon: Pure Poppy

Other; Copic Markers, buttons,

I got these amazing little frame ornament wall-hanging thingies at Michaels for $2.00 I think!  I got three of them and I have to say I am in LOVE with them!  Aren’t they the cutest?  Of course as soon as John saw the picture he says “the bottom loop is crooked”.  I bent it back.  What can you ask for for $2.00!  lol.  Seriously though, they are primed wood and wire.  Fabu.  Love it.  What else will you use those tiny pictures they put into your photo package on?  These are those “keepsake” photos…the thumbnail type ones they stick into your package from Target now.  It was a perfect fit to add some other stuff with it. I know you are probably sick of this photo, but it was perfect for the colors I wanted. I am actually going to get the girls Christmas pics done soon this year.  They will be more casual.  Cute sweaters with matching scarves.  I chopped off Sophie’s hair in the summer, so she looks so different now from this picture!  She wanted to look like Lucy Pevencie from “Narnia”.  She is too cute. 

SO… have you all been thinking about how everyone is partying away on the big stamping cruise?  Man I wish I was there, but since I am fat and hairy (well at least right now), it may be best that I am home as not to scare everyone!!  LOL!  Have a great day!

Stamps: Snowfall, 2008 Holiday Tag Collection (Noel sentiment)

Paper: Pure Poppy, Stampers Select White, Sky Blue SU!

Ink: White Chalk, Pure Poppy

Ribbon: Pure Poppy Stitched Grosgrain

Other: Marvy Super Jumbo Snowflake Punch, Buttons, Martha Stewart Clear Glitter


I think so often it is so easy to forget about the masculine side of stamping.  I know I do.  I wanted to make something today that I know John would like for Christmas and of course this could be a Father’s Day gift as well.  I am trying to mix up holidays recently, so you won’t become innundated by seeing the same thing over and over again.  We have a lot of them coming up, so I don’t want to skimp on any possible ideas!

So this is a tie box and tin.  The tin and clear box are over at Papertrey and I used the Father Knows Best patterned paper line along with the new release color “Ripe Avacado” to make the outer box.  I just put two mini glue dots under the tin to center it and to keep it from moving around in the box.  Another variation on this would be to fill the empty space around the tin with coffee beans, so essentially he would be getting some coffee with his tie…just not ON his tie! LOL!  Two gifts in one!  The problem being, John doesn’t drink coffee and actually hates it.  So don’t forget about ways to package those more masculine gifts!!  They are fun too!  Instead of a tie, you could make a travel toiletry kit with nail clippers, hotel soaps (they are nice and flat…but wrap them with nice patterned paper) some chap stick (John is addicted to it) and maybe a small travel size shampoo.  This way the tin could hold everything while he travels.  Or even a handy first aid kit for his car.  Man up!  ;))

So what are you all doing today?  I hope I was able to answer all of your e-mails yesterday concerning how you emboss the cards like that.  I think I am going to be doing a lot of laundry, but I am working on some more blog projects too.  I was supposed to go over to my Pastor/Friend’s house today for dinner, but he has a nasty cold.  So do my girls, so maybe it wasn’t meant to be today.  I was going to make the dinner and my friend was making dessert.  It would have been fun.  Have a great day!  Off to get some coffee!  At least someone likes it in this house 😉

Stamps: Father Knows Best, 2008 Holiday Tags Collection, Pond Life

Paper: Father Knows Best patterned paper (Retro Stripe), Ripe Avacado, Basic Black SU!

Ink: Metallic Gold

Ribbon: Ripe Avacado Grosgrain

Other: Clearly Creative Card Boxes, Clear Windowed Tin

OK…a couple of things for today!  So…we were given our next Stamp Simply challenge by a guest this week!  Heather Telford has asked the team to come up with a card using only sentiments!!  NO image stamps!  You can use patterned paper, repeat sentiments and whatever else you want…just NO image stamps!  This is what I came up with 🙂

OK…first off…I am in love with the new Papertrey Polka Dot Parade papers.  If you know me, you know I actually don’t use patterned paper that much when I stamp.  I have to say though…I am in LAHAHAHAHOVE with these new papers.  I blinged up some Maya Road flowers with Martha Stewart glitter to make the card “absolutely fabulous”  😉 

So here is what the other girls have done!  Read on after for what I did tonight!!!

Heather Telford (our lovely guest 🙂 )

Darlene Pavlick (our other lovely guest 🙂 )

Sharon

Julie

Dee

Tammy

Janine

Jennifer

So…today was the day.  The day that 364 days before this day leads to this moment every year.  The day that my husband spends stressing over for most of September and into October.  The day in which all German teachers in South Jersey do not envy my husband for.  The day where the Chicken Dance reigns supreme and the dutiful wife controls a kitchen full of parents leading them in the charge of cooking for 500 people.  The day.  The…FEST.


Gutes Essen, Gute Freunde, Gute Zeiten!

Good food, Good Friends, Good Times!

Collingswood High School OKTOBERFEST 2008!  It was a success, a blast, and a night full of Bavarian madness! It is over John!!   Thanks for looking 😉

Supplies:

Stamps: Mixed Messages

Paper: Aqua Mist CS, Lemon Tart CS, Spring Moss CS, Polka Dot Parade Patterned Paper

Ink: Aqua Mist

Ribbon: Aqua Mist Grosgrain

Other: Maya Road Flowers, Martha Stewart Glitters


Like what you see?  Just head over to the Papertrey Ink Gallery for the supply lists!  I’m not feeling too well today.  Neither is John, so I’m not going to chat too much.  Have a great day and I hope you like the projects for this month 🙂

Nichole issued the Design Team a challenge to make mass produced cards for the Holidays! 

What an important thing to do now if you haven’t started yet!  I know some of you out there are good busy bees, making a Christmas card every day throughout the year with your other projects.  Well…if you are anything like me…Miss “I have way too many other things to be doing than an extra ANYTHING right now” on a daily basis…well…I have the card for you…AND it is fun…AND you can even get your kids to help you!!  What?  Oh yes…they can!  You know we have children for some free labor every once and a while, right?  let me explain.  The card I made for you is all made from punches!!  Super easy and super teachable to your kids, so they can feel special and help out!  First the cards:

See?  This will be very simple to do when you follow my instructions…and yes…even though it doesn’t look fast, it is QUITE fast!!  remember…punches are fast little tools and VERY kid friendly!

Go and check out what the other girls have done and make SURE you go and visit Nichole’s blog to get the Supply Lists for each set of cards!!!

Nichole

Debbie

Lisa

Lauren

Geny

Michelle

Betsy

Heather

Melissa

Dawn

Nicki

Next Page »